


These delightfully soft gingerbread cinnamon rolls feature a luscious homemade dough enhanced with a brown sugar molasses swirl and the perfect hint of spice. Similar to my traditional cinnamon rolls, they’re irresistibly soft, buttery, and sweet, but they bring a festive gingerbread twist to the table. Just imagine the heavenly aroma wafting through your kitchen as they bake!
A Cozy, Decadent Holiday Brunch Recipe
Here it is: the holiday brunch dish you’ve been craving (or perhaps didn’t even realize you wanted)! Throughout the years, many readers have inquired about a gingerbread cinnamon roll recipe. Well, it’s the season of generosity, and today I’m delivering what you asked for! …Or at least what many others have requested. 😉
Why You’ll Adore Them
- Warm spices and molasses infuse the comforting flavors of gingerbread cookies into the delightfully gooey filling.
- Soft, rich dough that remains tender for days on end.
- Gooey brown sugar filling filled with festive holiday spices.
- Cinnamon cream cheese frosting seeps into every delicious swirl.
- Ideal for Christmas morning, brunch gatherings, or make-ahead baking.
A Simple Dough Recipe
We’re utilizing the same dough as these popular chocolate sweet rolls. Just look at the abundance of 5-star reviews! Readers can’t get enough of this dough. It’s a touch more buttery and simpler to handle than my classic overnight cinnamon rolls dough.
This is a rich dough, made with fat like milk, butter, and eggs. Rich doughs create soft breads like dinner rolls, pull-apart bread, and glazed doughnuts. Conversely, lean doughs lack fat and yield crusty breads such as homemade bagels, artisanal loaves, and pizza dough.
I suggest using bread flour for these gingerbread cinnamon rolls, but all-purpose flour will suffice too. The texture of the rolls will be slightly chewier and flakier with bread flour, yet soft and fluffy nonetheless.
- Instant Yeast or Active Dry? You can opt for either instant yeast or active dry yeast in this dough. I typically use instant yeast and still proof it quickly in step 1. Proofing entails mixing it with a bit of sugar and warm liquid to confirm its activity; the mixture will foam on top. While proofing isn’t usually necessary for instant yeast, it only takes 5 minutes and allows you to prepare the other dough ingredients while you wait.

Let Me Guide You Through the Process
If you’ve made homemade cinnamon rolls before, this procedure should feel familiar. Proof the yeast, prepare the dough, allow it to rise, punch it down, roll it out, add the filling, roll it up like a jelly roll, cut into individual rolls, let them rise until puffy, and finally bake.
This rich dough should remain very soft, so avoid adding more flour than necessary. Embrace the softness and a sticky work surface; if you don’t mind the slight mess, you’ll be rewarded with the richest, flakiest gingerbread cinnamon rolls.
Here’s the dough as we knead it:
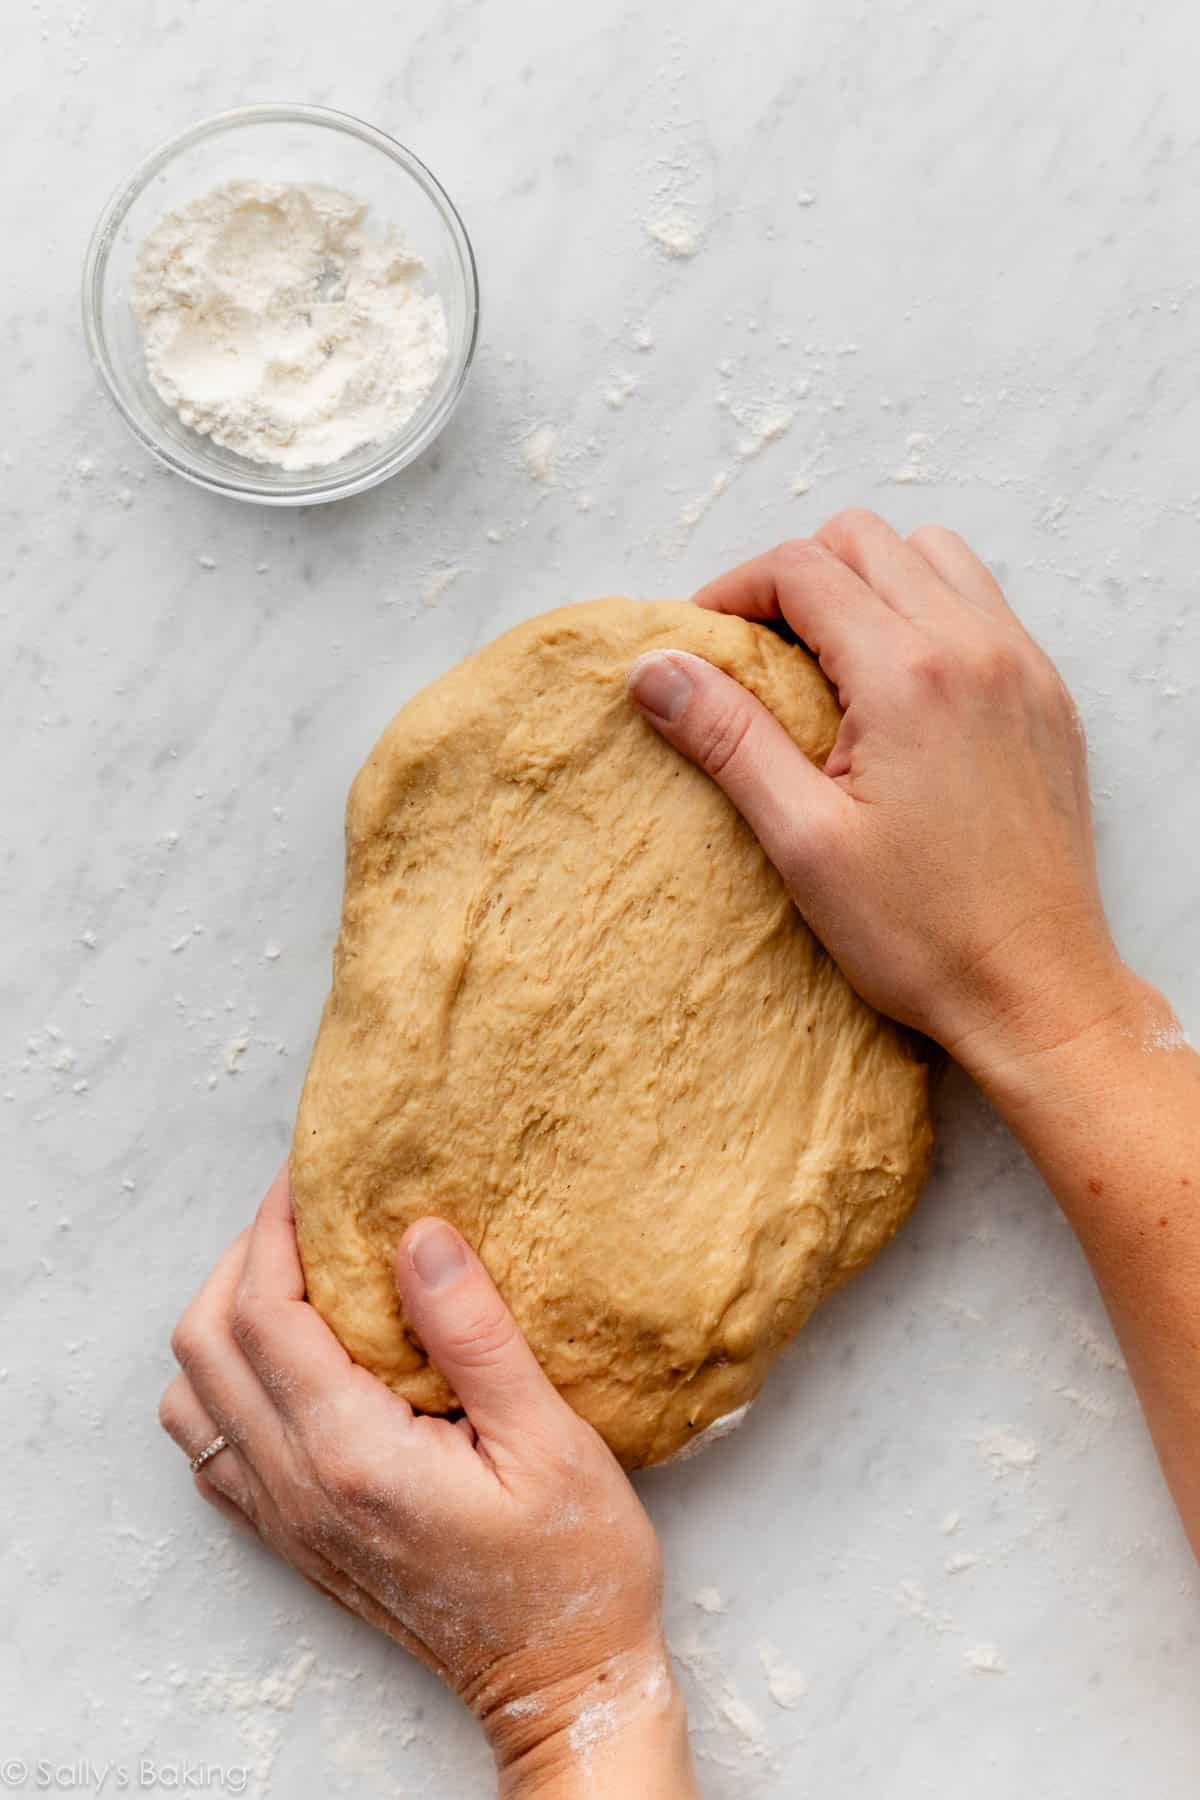
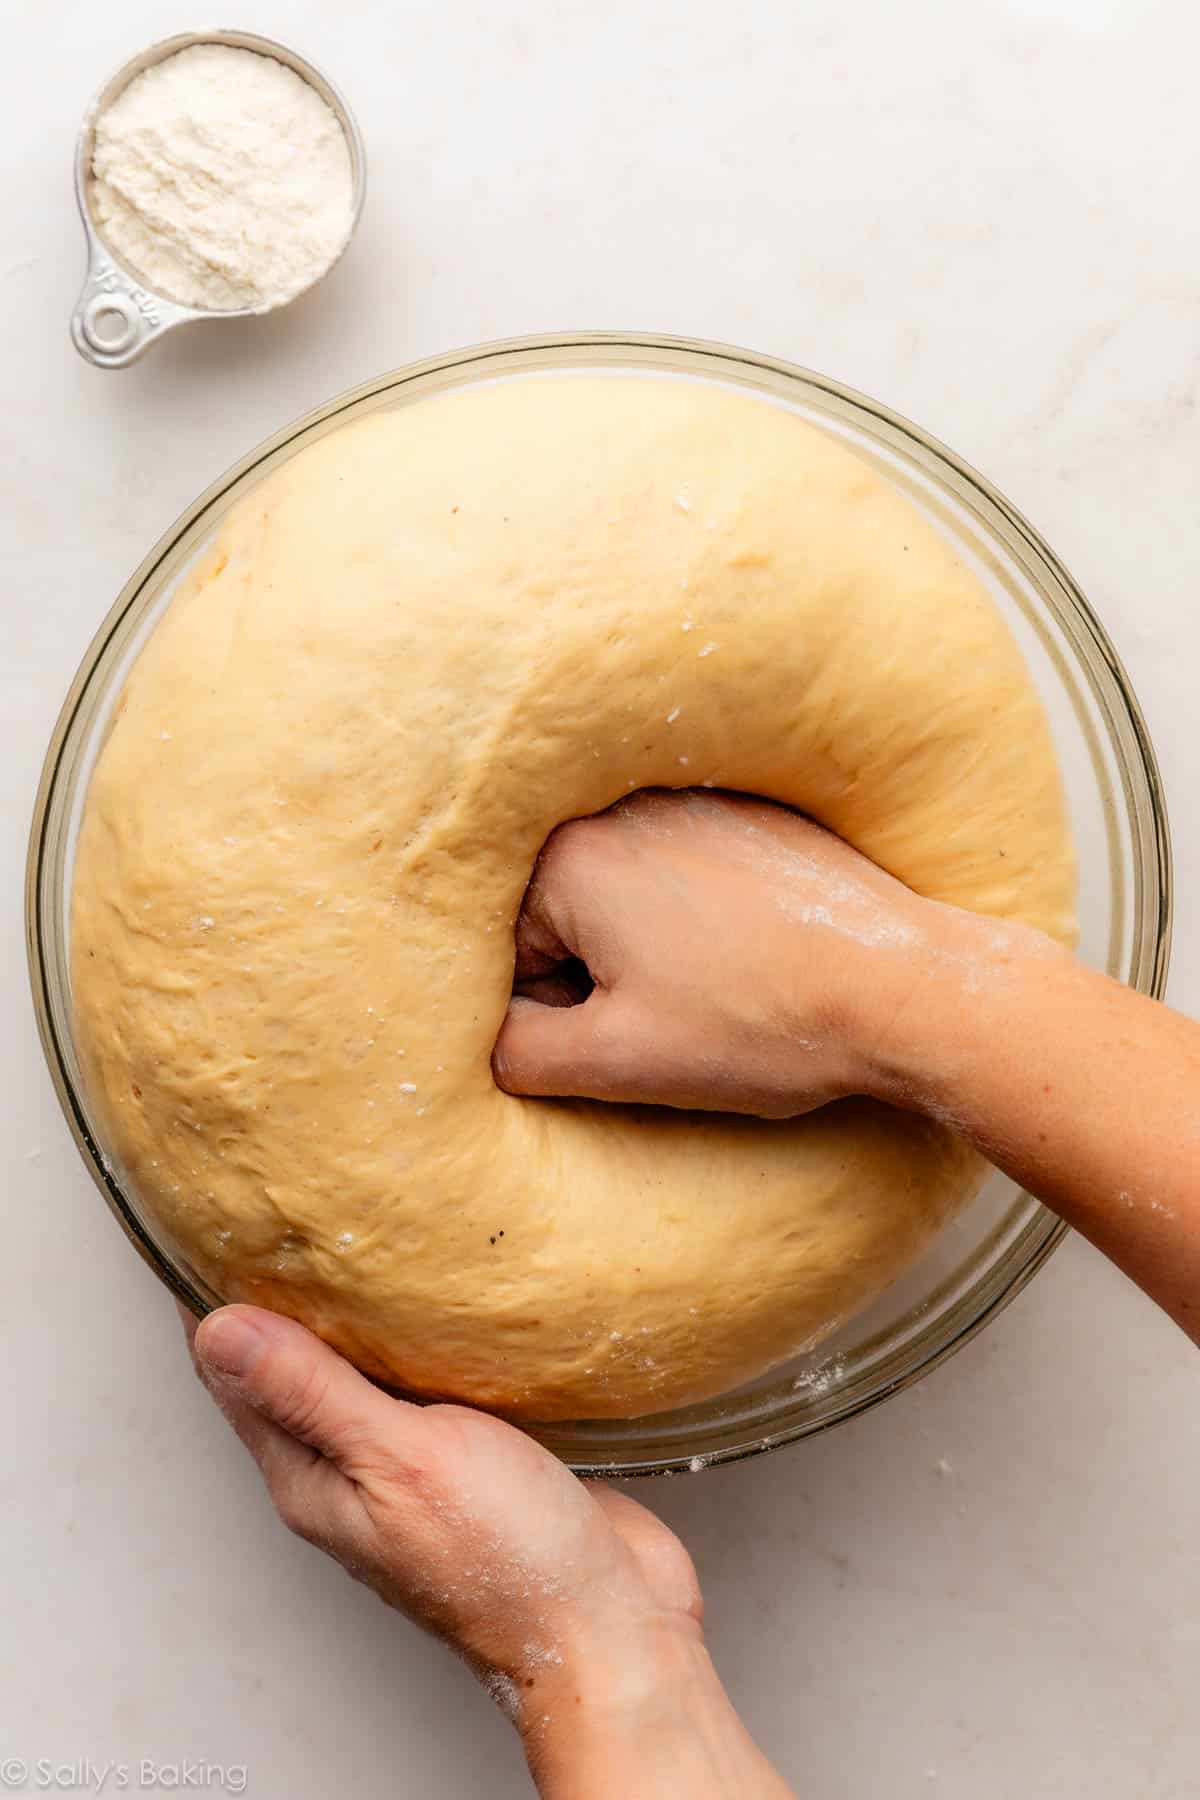
After kneading, the dough will be exceptionally soft and elastic. Cover it in a bowl and allow it to rise until it has doubled in size, around 2 hours. Then, punch it down and shape it:
Filling for Gingerbread Cinnamon Rolls
For the molasses-spiked cinnamon roll filling, it’s best to prepare it in two stages.
- Combine the wet ingredients—super-soft butter and molasses—and spread them onto the rolled-out dough.
- Mix the dry ingredients—brown sugar and spices—and sprinkle them generously over the dough.
*During testing, my team and I attempted to blend everything together first; however, it resulted in an overly gooey mix. Gooey cinnamon roll filling is delightful, but gloopy filling is not. Keeping the wet and dry ingredients separate yielded better results.*
Note on molasses: Avoid using blackstrap molasses, as it’s overly strong and bitter. Opt for molasses labeled as “unsulfured” or “dark.” I typically use Grandma’s “original” brand with the yellow label.

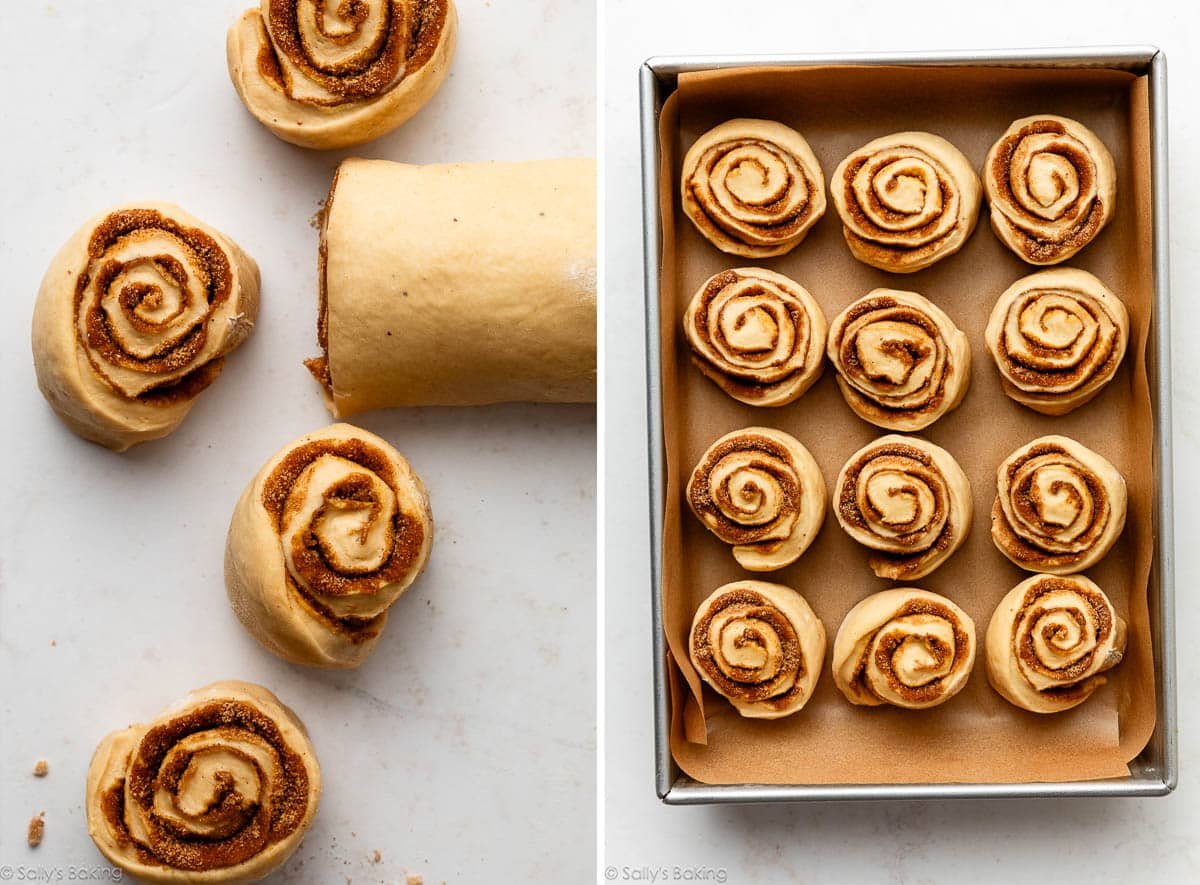
Roll the dough into a 16-inch log and slice it into 12 equal pieces. Arrange them in a greased or lined 9×13-inch baking pan:
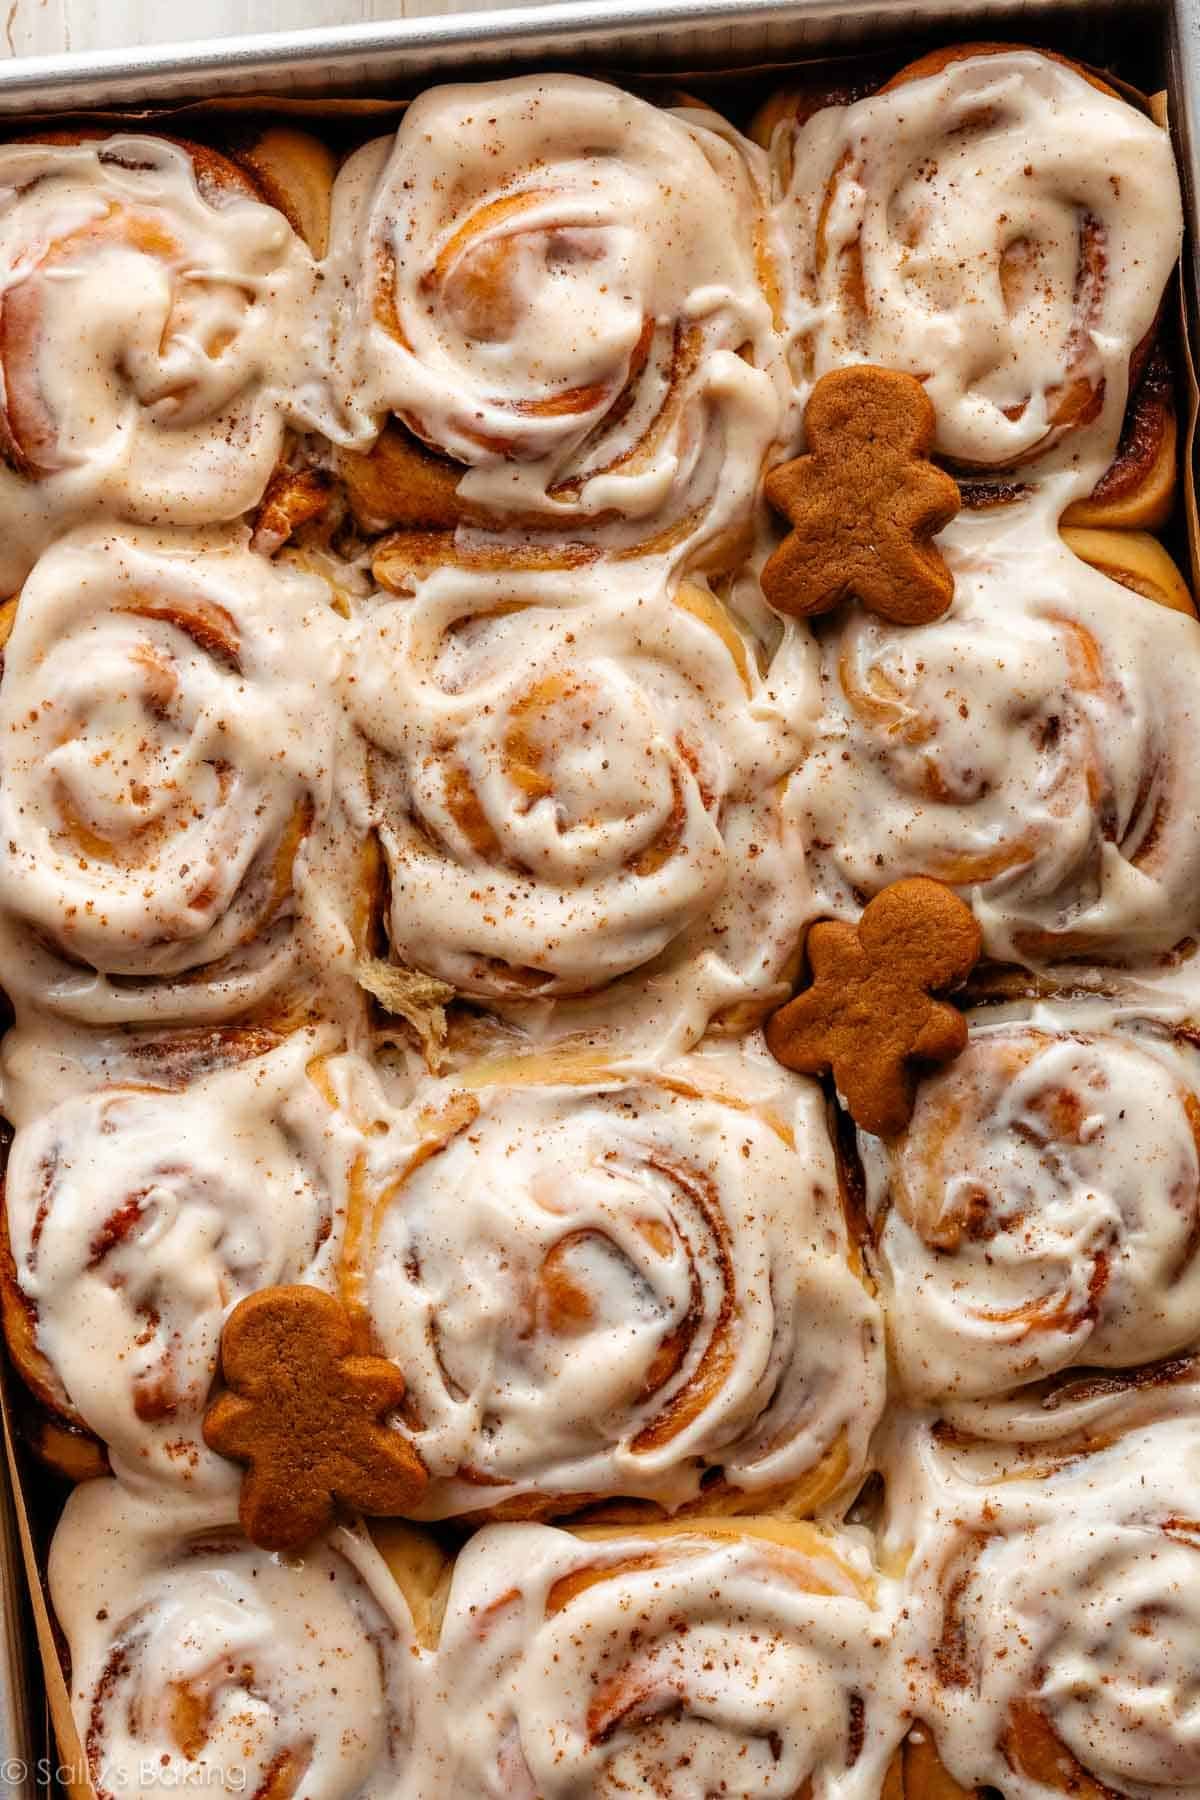
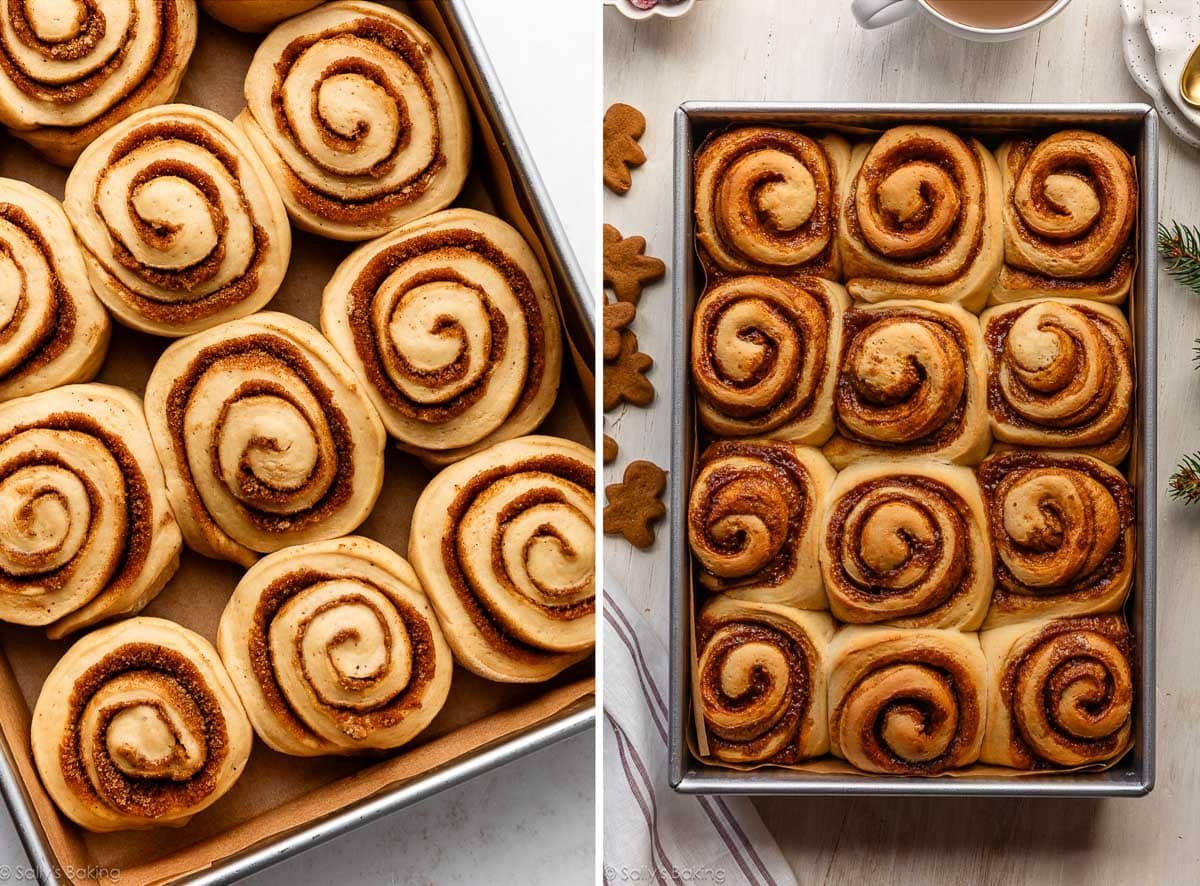
Allow the shaped rolls to rise for approximately 1 hour, then bake until golden and toasty:
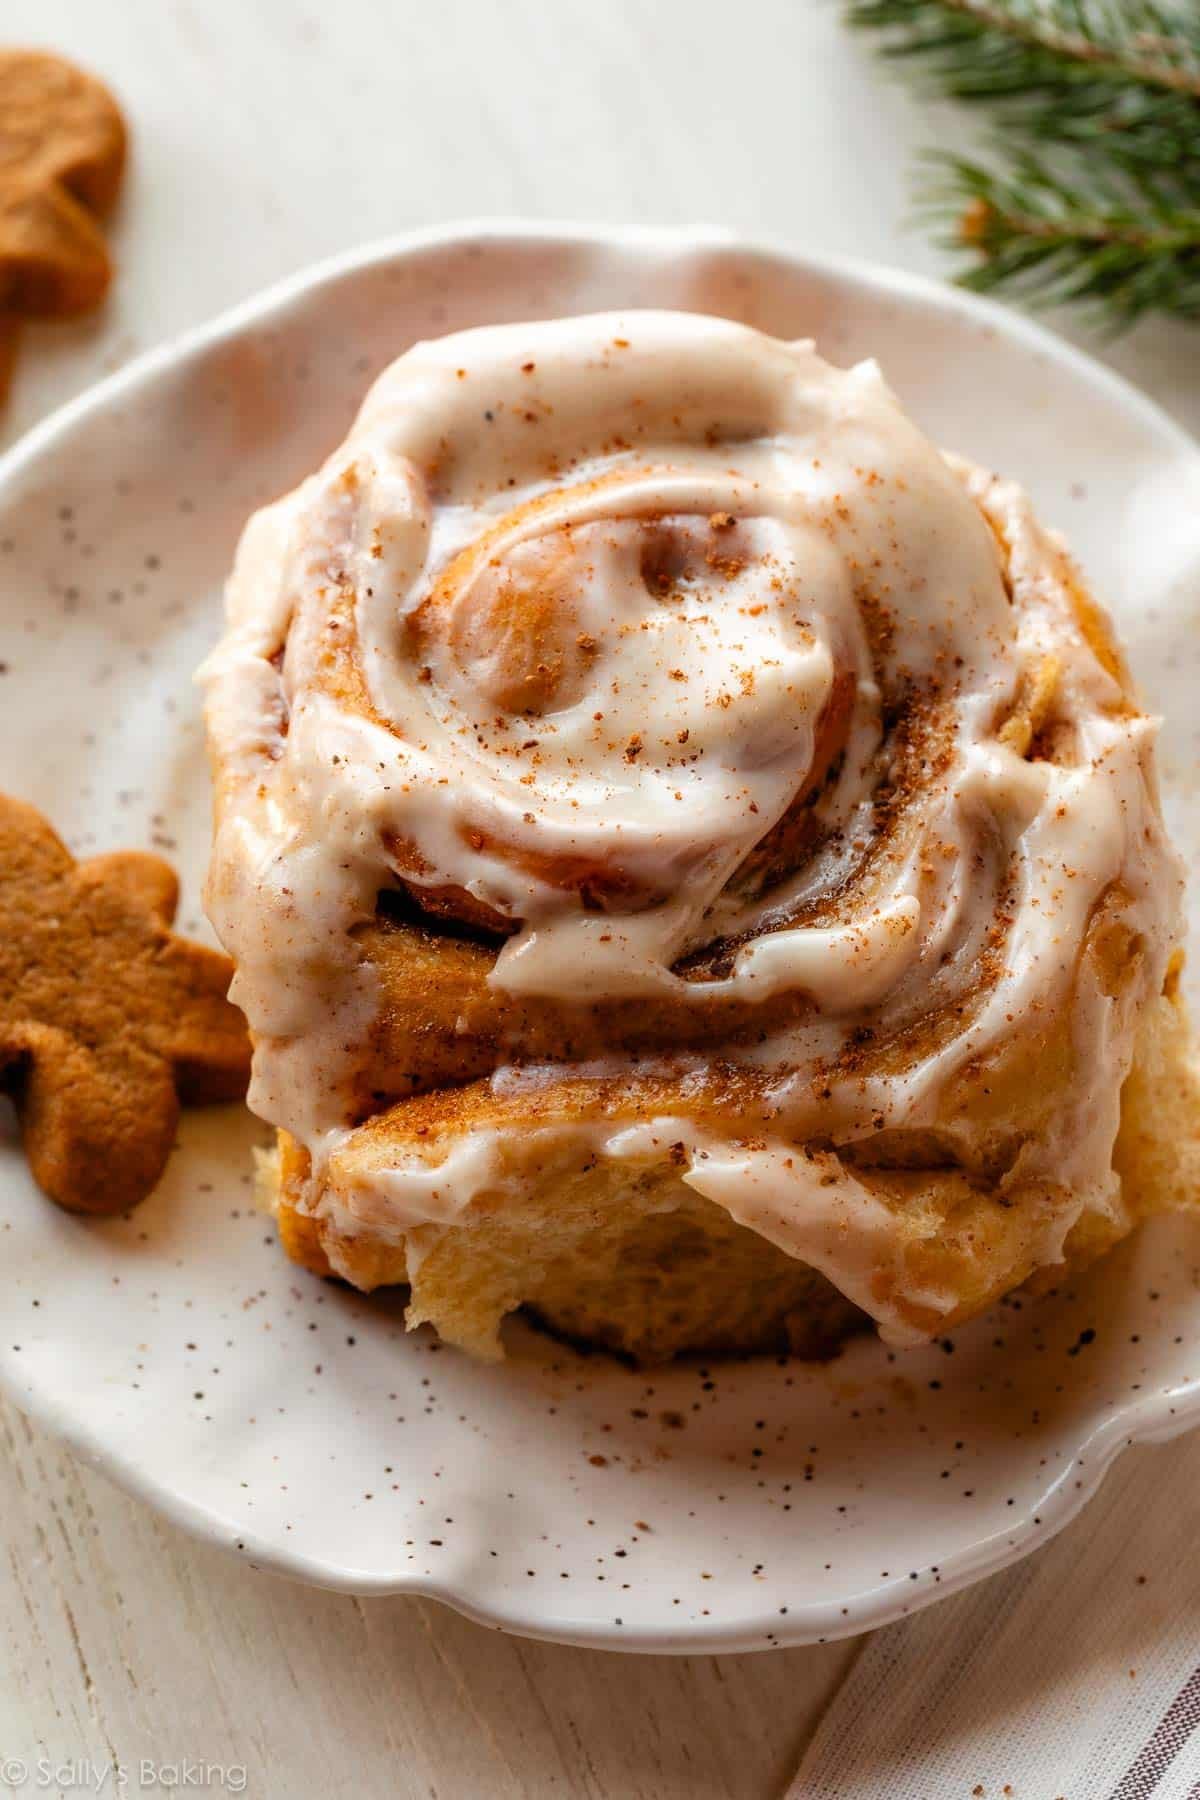
Cinnamon Cream Cheese Frosting & Alternative Topping Ideas
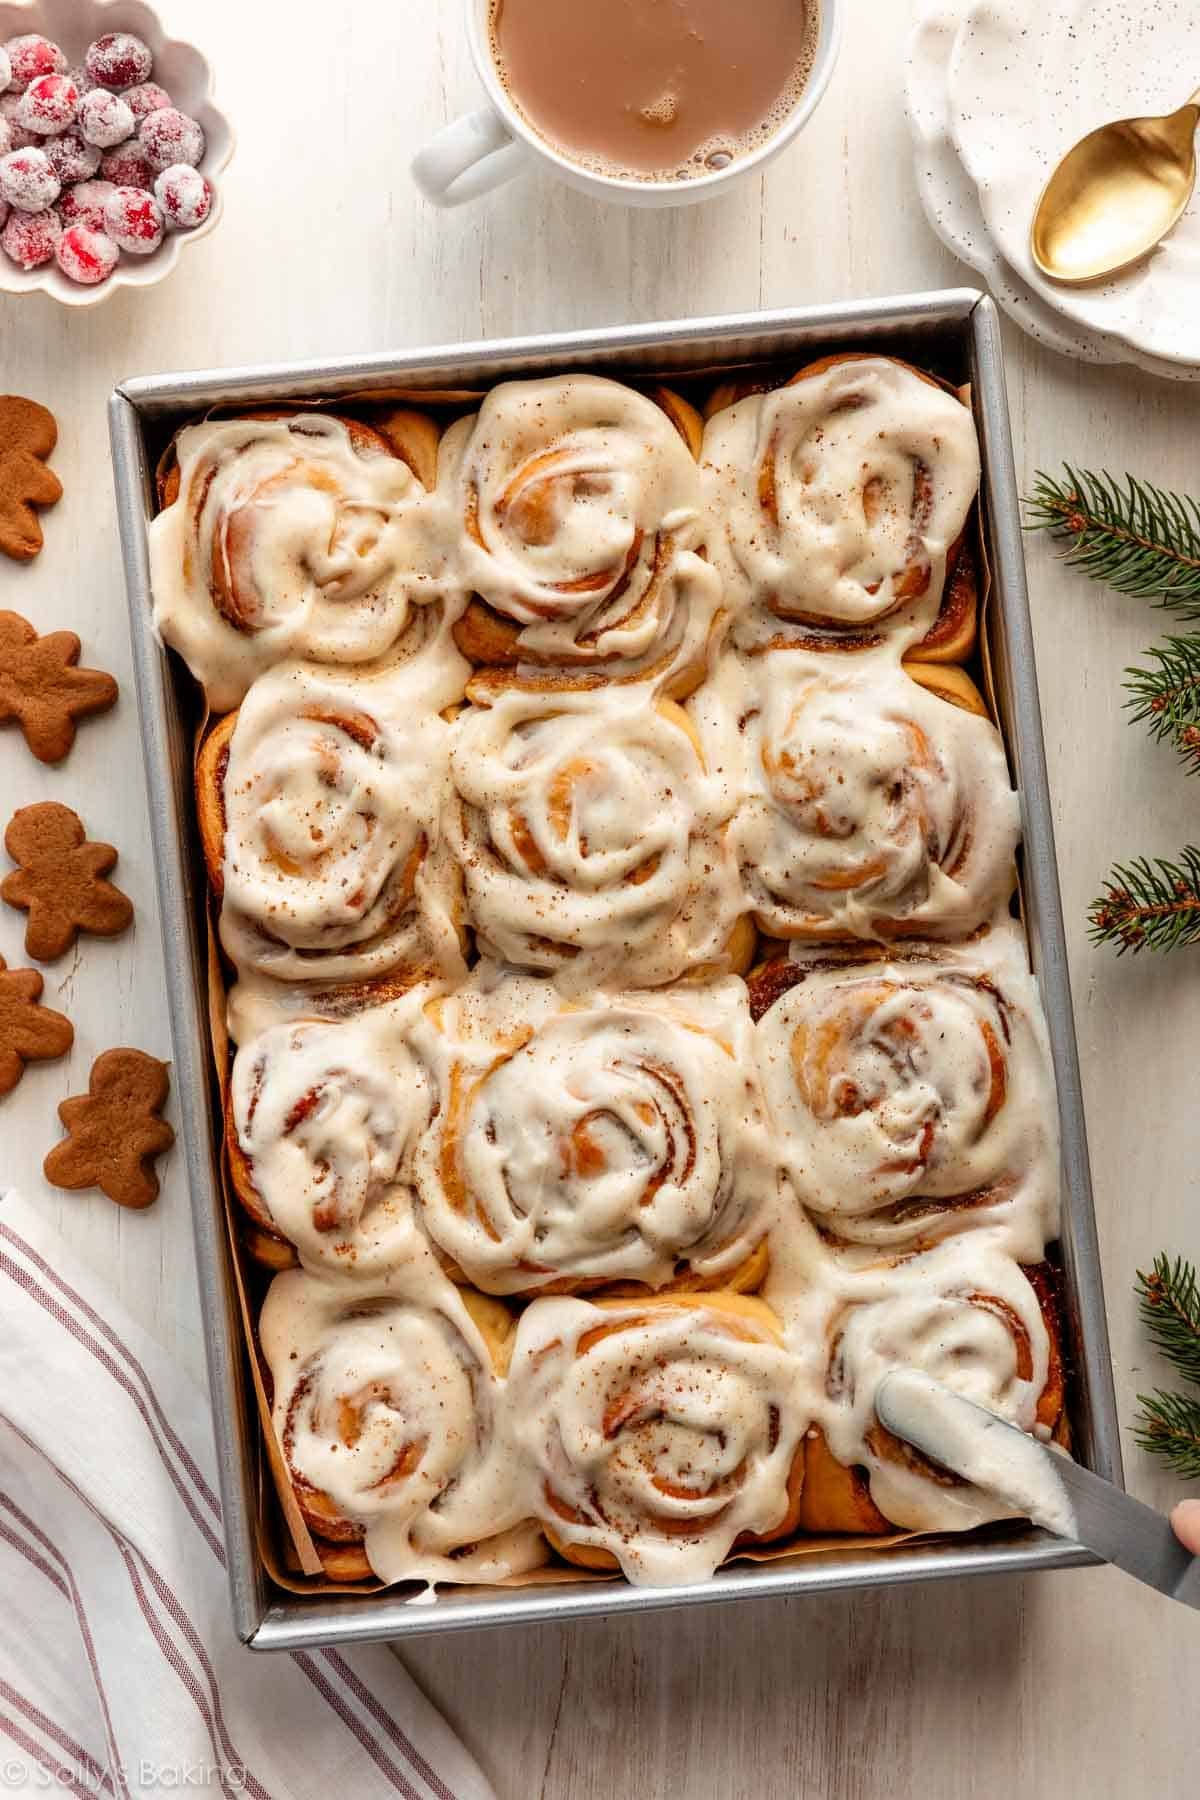
Who can resist the allure of cream cheese icing? *Raises hand.* A cinnamon cream cheese frosting perfectly complements these spiced rolls. You might also consider topping them with small gingerbread cookies (store-bought or homemade if you’re prepping the cookie dough!), and/or sugared cranberries.
If cream cheese frosting isn’t your favorite, here are some other topping options:
Gingerbread Cinnamon Rolls Make-Ahead & Freezing Options
You can definitely prepare these gingerbread cinnamon rolls the night before. After shaping and slicing the rolls, arrange them in the baking pan, cover tightly, and refrigerate for up to 16 hours. The next morning, take them out of the refrigerator and let them rise at room temperature until they are puffy (about 1–2 hours), then bake as instructed.
This overnight option is especially perfect for Christmas morning or festive brunch—fresh, warm cinnamon rolls without the early-morning hassle.
There are several methods to freeze these gingerbread cinnamon rolls. Fully baked (either frosted or unfrosted) rolls can be frozen for up to 3 months. Simply thaw overnight in the refrigerator, then warm gently before serving. You can also freeze the rolls unbaked or par-baked; check out the detailed freezing instructions in the recipe below for those options.
Molasses is essential for the gingerbread flavor. Omitting it will yield rolls that taste more like regular cinnamon rolls with added spice—still good, but not quite gingerbread. I wouldn’t recommend skipping it.
Certainly! For a milder spice profile, feel free to reduce or omit the cloves and nutmeg. The cinnamon and ginger contribute most of the primary flavor.
Absolutely! Using all-purpose flour will still yield soft, fluffy results, though bread flour provides slightly chewier and flakier rolls.
Yes! Check the make-ahead & overnight options mentioned above.
More Gingerbread Recipes
Print
Description
These ultra-soft gingerbread cinnamon rolls feature a molasses-spiced brown sugar filling topped with creamy cinnamon cream cheese frosting. This cozy holiday breakfast or brunch dish can be made ahead, stored overnight, or frozen for later enjoyment. If you’re new to yeast bread baking, refer to my Baking With Yeast guide for extra assistance and tips for success.
Dough
Gingerbread-Flavored Filling
Cinnamon Cream Cheese Frosting
- Proof the yeast: In the bowl of your stand mixer fitted with a dough hook or paddle attachment, combine the warm milk, 2 tablespoons of brown sugar, and yeast. Cover and let sit for about 5 minutes, until foamy. *If you lack a stand mixer, you can do this in a large mixing bowl and mix the dough in the next step using a large wooden spoon or rubber spatula. It will require some arm strength. A hand mixer is workable but may leave the sticky dough stuck in the beaters. Mixing by hand is the preferred approach.
- Prepare the dough: Add the remaining brown sugar, melted butter, eggs, salt, ginger, nutmeg, and 1 cup (approximately 130g) of flour, and blend on medium speed for 1 minute. Use a silicone spatula to scrape down the sides. Add 3 cups (about 390g) of flour, reduce speed to low, and mix until a soft dough appears that pulls away from the sides of the bowl. The dough should be very soft without being overly sticky. If it feels too sticky and attaches to the sides, add flour, 1 tablespoon at a time, until the dough pulls away while remaining moist and tacky. If it feels dry, gradually incorporate more milk, 1 teaspoon at a time, mixing well after each addition.
- Knead the dough: Keep the dough in the mixer (switching to the dough hook if you were using the paddle) and knead for another 6–8 minutes or, alternatively, knead by hand on a lightly floured surface for 6–8 minutes. (If you’re new to bread baking, check out my How to Knead Dough video tutorial for help.) If the dough becomes excessively sticky while kneading, sprinkle more flour gradually. Once kneaded, it should still feel soft. Poke it with your finger—if it springs back slowly, it’s ready to rise. You can also try a “windowpane test” by taking a small piece of dough and stretching it gently until thin enough for light to pass through. Hold it up to a light source. If light gets through without tearing, the dough is kneaded sufficiently. If it tears, keep kneading until it passes the windowpane test.
- 1st Rise: Lightly grease a large bowl with oil or nonstick spray. Place the dough in the bowl, turning to coat. Cover the bowl with aluminum foil, plastic wrap, or a clean kitchen towel. Let rise in a warm place for about 2 hours or until doubled in size. (I usually let it rise on the counter; it takes about 2 hours. For a slight reduction in rise time, refer to my answer to Where Should Dough Rise? in my Baking with Yeast Guide.)
- Prepare the filling: Using a hand mixer or stand mixer with a paddle attachment, beat the softened butter and molasses on medium-high speed in a medium bowl. In a separate small bowl, blend the brown sugar, cinnamon, ginger, nutmeg, and cloves together.
- Grease a 9×13-inch glass baking pan or metal baking pan, or line it with parchment paper. Punch down the dough to release any air.
- Roll out the dough: Place the dough on a lightly floured surface and roll it into a 10×16-inch rectangle using a lightly floured rolling pin. Ensure the dough is evenly thick and smooth. If it continues to shrink while rolling, stop, cover lightly, and let it rest for 10 minutes to relax the gluten. It should then stretch more readily.
- Add the filling: Spread the butter-molasses mixture over the rolled-out dough, then sprinkle the sugar-spice mixture evenly on top. Roll the dough tightly into a 16-inch long log. Using a sharp knife or bench scraper, cut it into 12 equal rolls, each measuring about 1–1.5 inches wide. Place them in the prepared baking pan. If any filling spills out while shaping, you can sprinkle it back on top of the rolls.
- 2nd Rise: Cover the rolls tightly and let rise until they have doubled in size, about 1 hour. (Alternatively, use the overnight method described earlier.)
- Bake the rolls: Preheat the oven to 350°F (177°C). Bake the rolls for 25–28 minutes or until lightly browned on top. (Glass pans may need an additional 2–3 minutes.) Tent a piece of aluminum foil loosely over the top of the pan after about 15 minutes to prevent over-browning. To be precise, the rolls are fully baked when an instant-read thermometer inserted into the center reads 195–200°F (91–93°C).
- Remove the pan from the oven and set it on a cooling rack to cool for about 10 minutes as you prepare the icing.
- Prepare the icing: In a medium bowl, using a hand mixer or stand mixer with a paddle or whisk attachment, beat the cream cheese on high until smooth and creamy. Add the butter and mix until well blended, then incorporate the confectioners’ sugar, vanilla, and cinnamon until combined. Use a knife or icing spatula to spread the icing over the warm rolls and serve right away. You may garnish with sugared cranberries & gingerbread cookies if desired.
- Cover any leftover frosted or unfrosted rolls tightly and store in the refrigerator for up to 5 days.
Notes
- Make-Ahead Instructions – Overnight: To prepare in advance, follow the recipe up to step 8. Cover the rolls and refrigerate for 8–12 hours. (16 hours max. While 8–12 hours is ideal, 16 is permissible if absolutely necessary. Do not exceed 16 hours.) In the morning, pull them from the fridge, keep covered, and let rise for 1–2 hours at room temperature before proceeding with step 10.
- Make-Ahead Instructions – Freezing: You can store cinnamon rolls in the freezer for up to 3 months, and I have a few methods for doing so. The first is to freeze them after shaping, before their second rise (step 8). Thaw them in the fridge overnight, then let rise at room temperature for 1.5–2 hours before baking. The second option is to par-bake the risen rolls for 10 minutes, allow them to cool completely, then freeze. Thaw them in the fridge overnight, then let sit at room temperature for 30 minutes before finishing baking for 15–20 minutes. Fully baked cinnamon rolls can also be frozen; refer to How to Freeze Cinnamon Rolls for details on all these methods.
- Special Tools: (affiliate links): Stand Mixer or Large Glass Mixing Bowl with Silicone Spatula or Wooden Spoon | Rolling Pin | 9×13-inch Glass Baking Pan or Metal Baking Pan | Cooling Rack
- Milk: For the best flavor and texture, I recommend whole milk. Buttermilk can also be used. Reduced-fat, low-fat, or nondairy milk can work in a pinch, but avoid nonfat milk.
- Yeast: Ensure you’re using 1 Tablespoon of yeast, which is slightly more than one standard packet. Both active dry and instant yeast work here; follow the same instructions for either. Usually, active dry yeast will have slightly longer rise times. Check out my Baking with Yeast Guide for solutions to common yeast questions.
- Best Flour to Use: For optimal texture, I recommend bread flour. All-purpose flour can also be used, and the rolls will remain wonderfully rich and soft. Bread flour tends to result in a slightly chewier and flakier end product.
- Molasses: Avoid using blackstrap molasses due to its bitterness; instead, opt for molasses labeled as “unsulfured” or “dark.” I generally use Grandma’s brand “original” with the yellow label.
- Alternative Icing Options: Instead of spiced cream cheese icing, consider simple vanilla icing, plain cream cheese icing from these easy cinnamon rolls, orange icing from these orange sweet rolls, maple icing from pumpkin cinnamon rolls, caramel icing from apple cinnamon rolls, or espresso icing from these chocolate sweet rolls.
- Gluten Free: This recipe has not been tested with gluten-free flour, so results may vary.