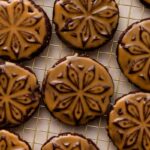

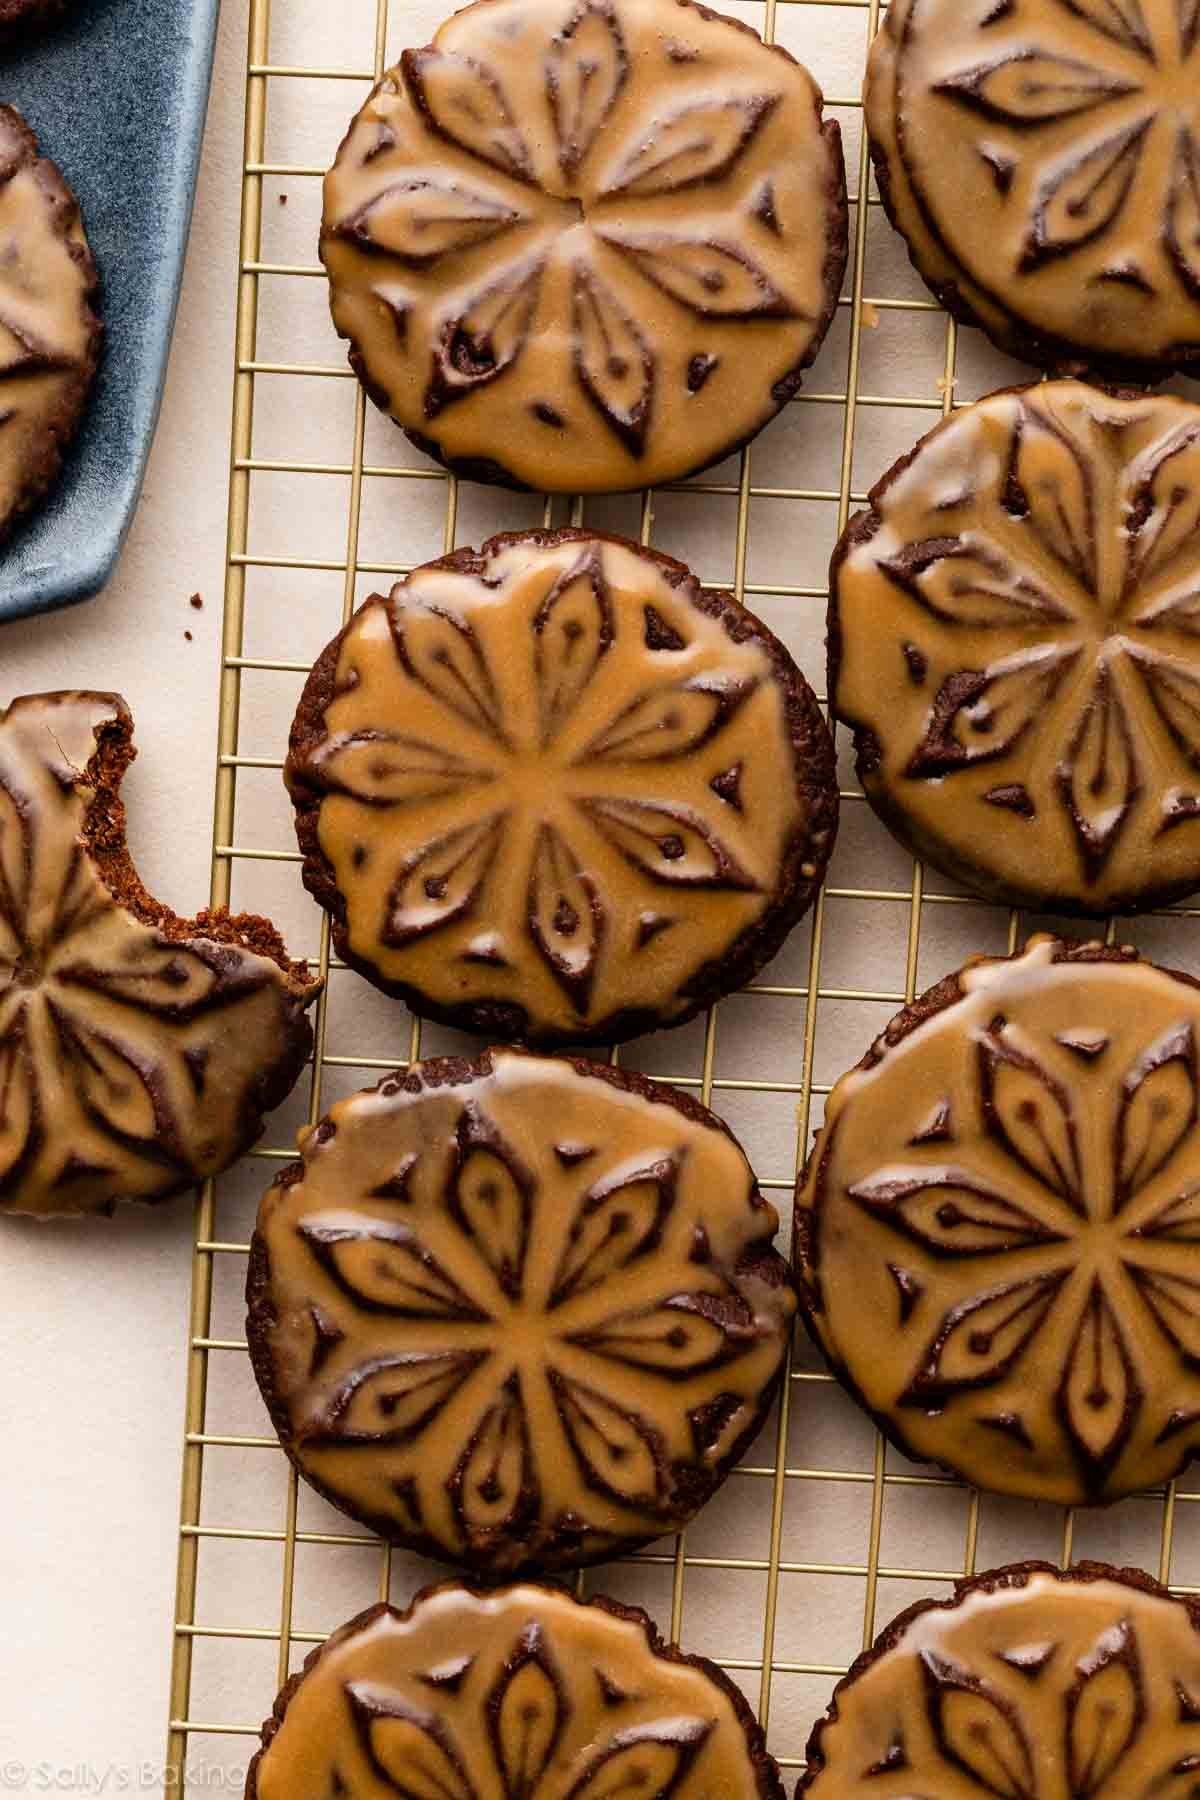
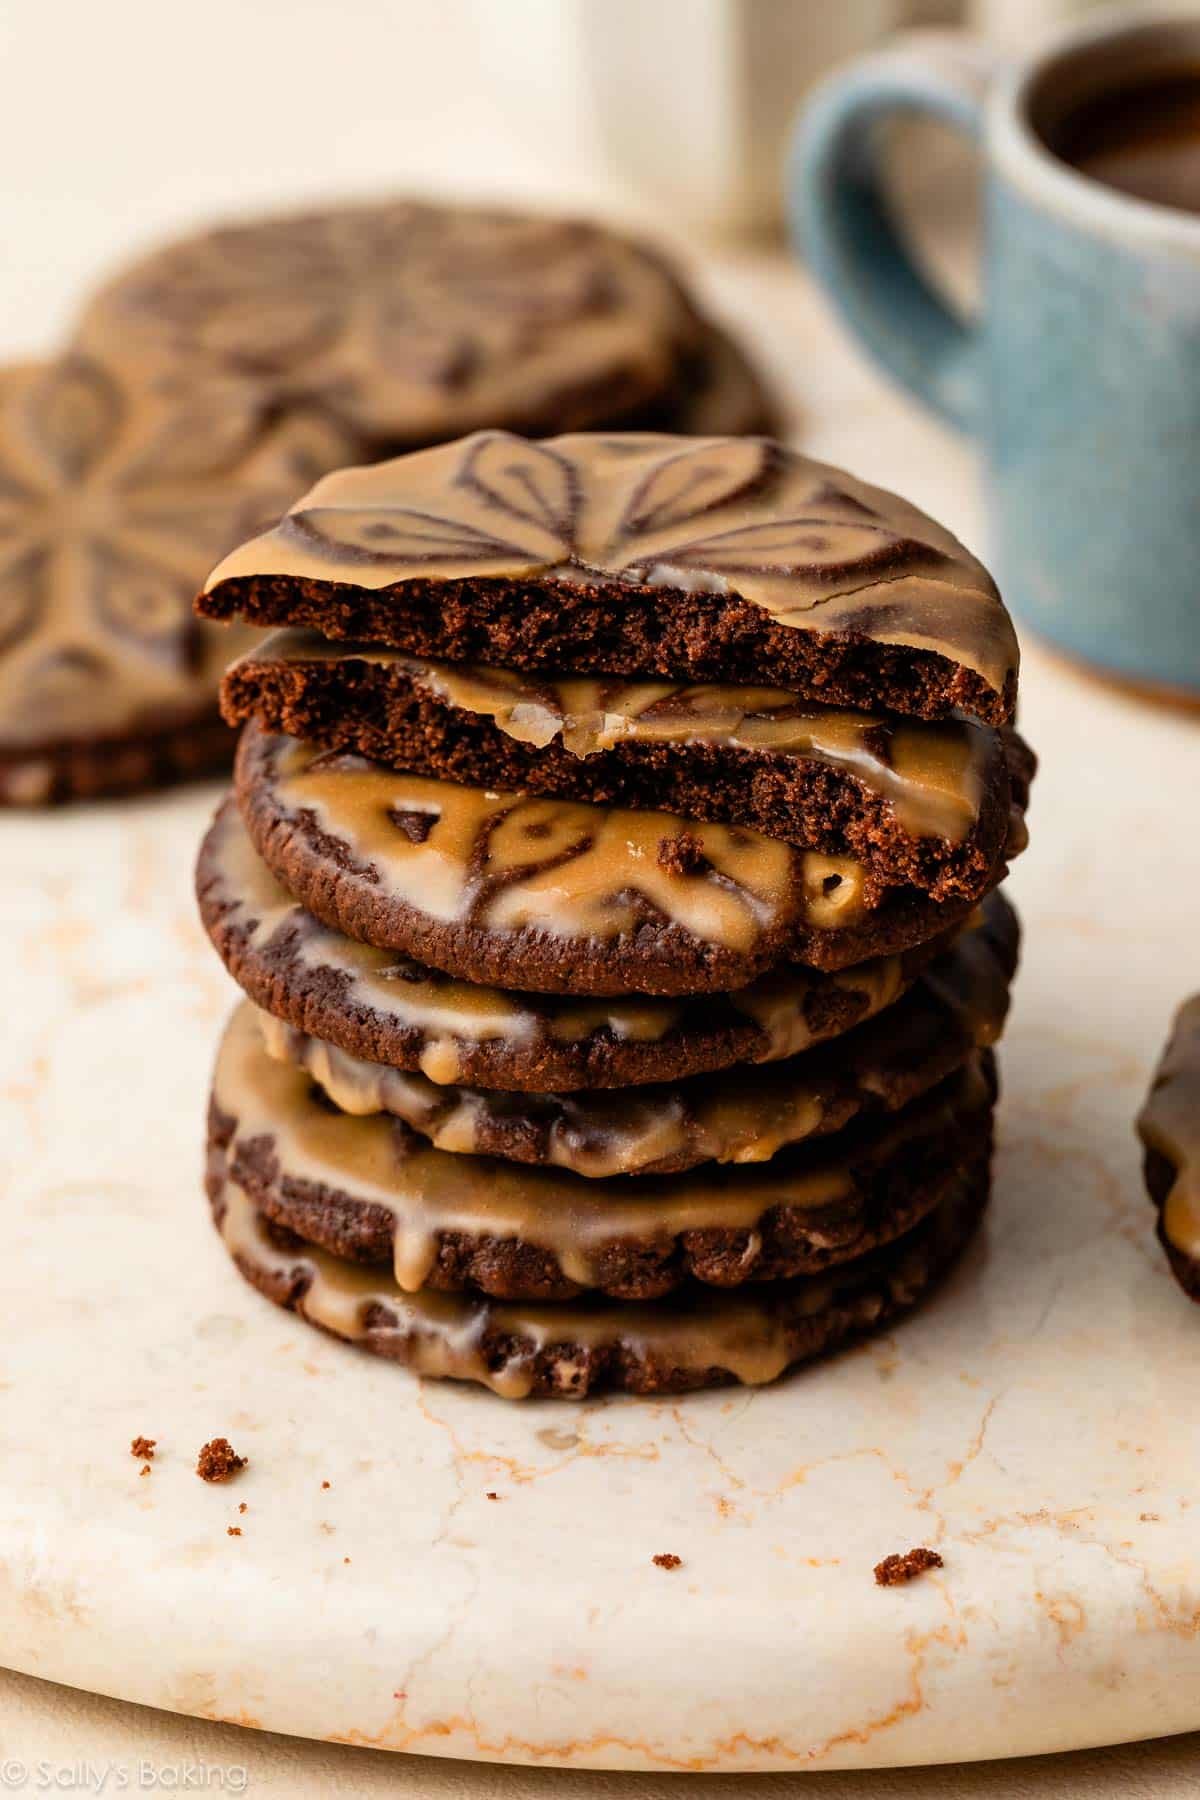
These stamped chocolate espresso cookies are a complete treat: rich in flavor, elegantly shaped, and adorned with a shiny espresso glaze that solidifies. No intricate or lengthy decorating steps here—the design is baked directly in! You’ll need a set of cookie stamps for this, and I prefer these cookie stamps for the cookies shown. If you’re new to cookie stamping, check out my essential tips for success below.
There’s a unique joy in taking out a tray of beautifully stamped cookies from the oven… especially when they’re rich in chocolate and filled with the inviting aroma of a café. They look incredible, taste delightful, and come together using just common pantry ingredients. These stamped chocolate espresso cookies are a fantastic gift option that exude elegance, yet are easy to whip up in your own kitchen—no need for fancy decorating skills.
Why You’ll Love These Chocolate Espresso Stamped Cookies
- Chocolate + espresso = a mature, refined flavor combination
- Crisp edges, soft centers—similar to a cut sugar cookie. Not cakey, but wonderfully tender!
- Beautiful stamped designs that are festive—no piping tips or royal icing needed
- Make-ahead friendly
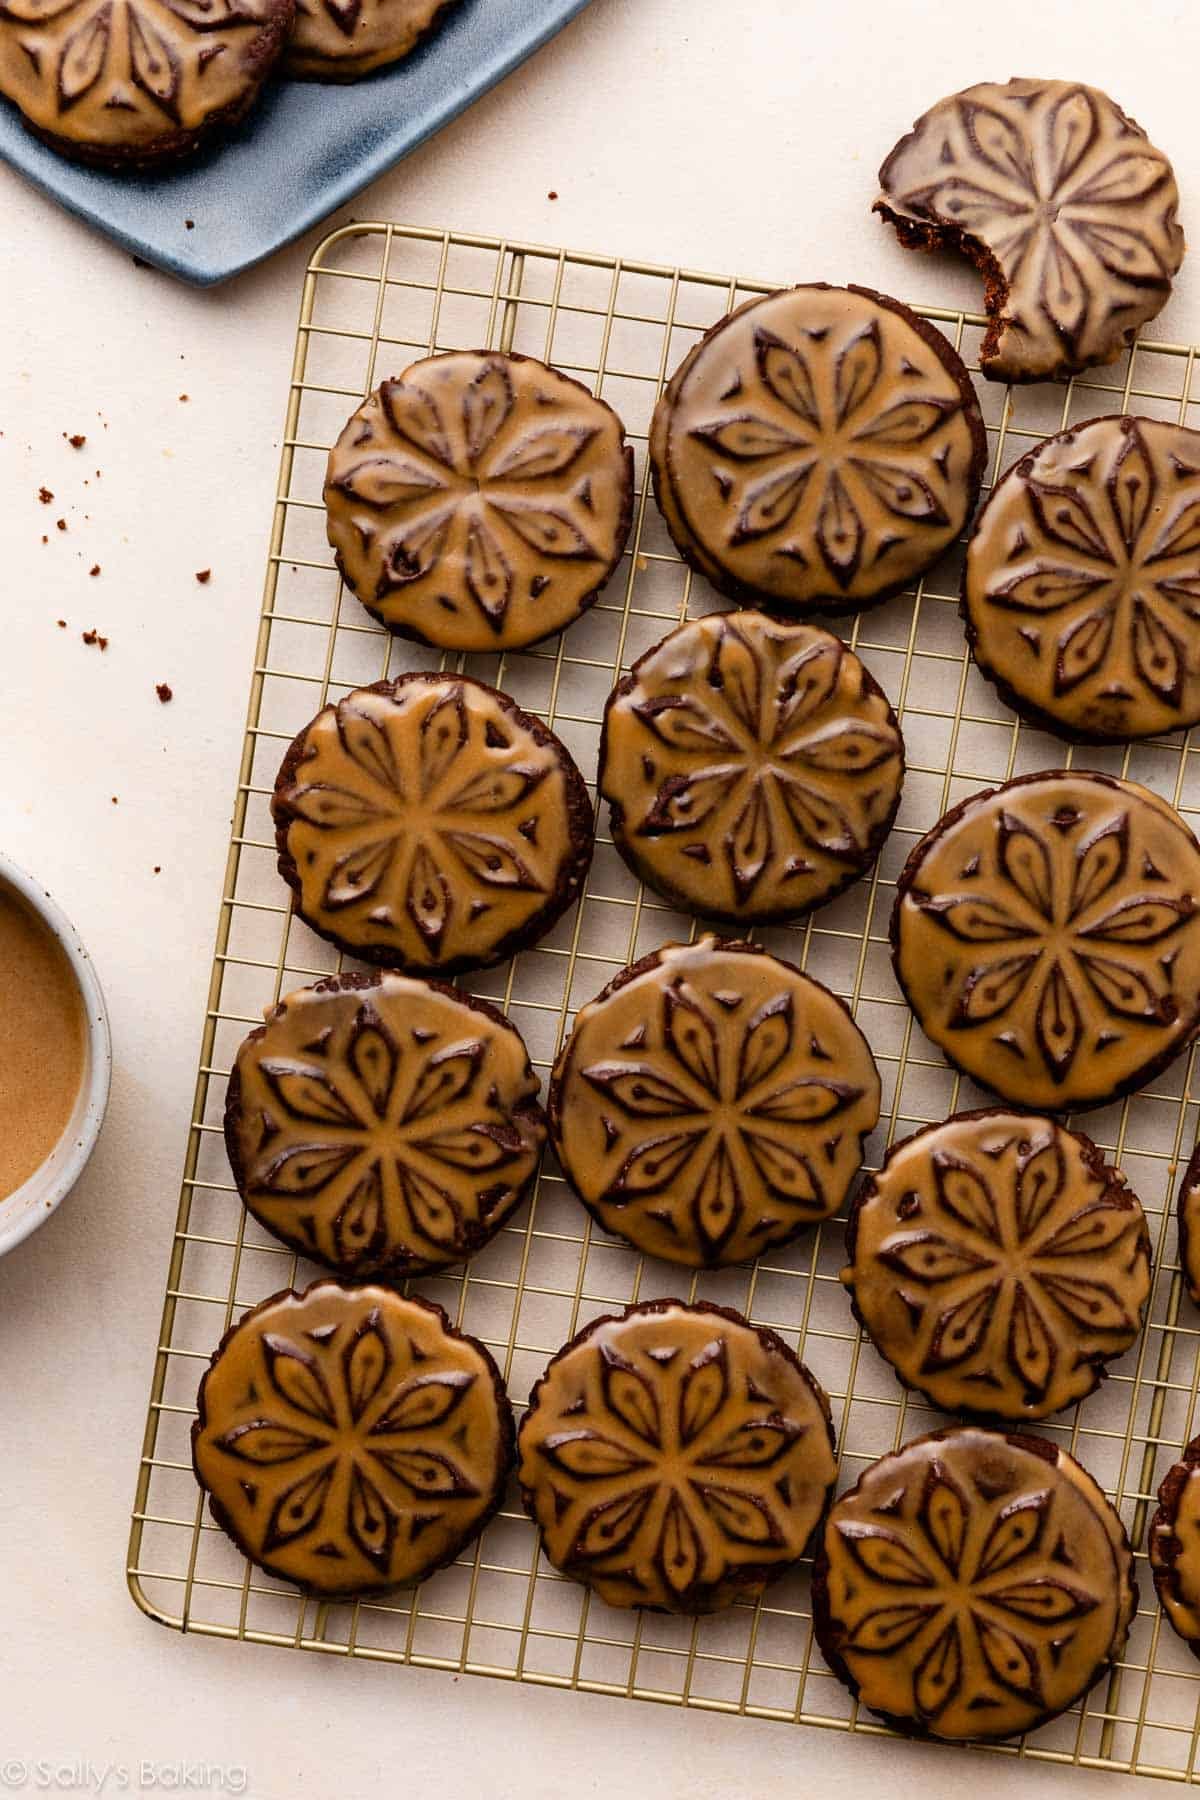
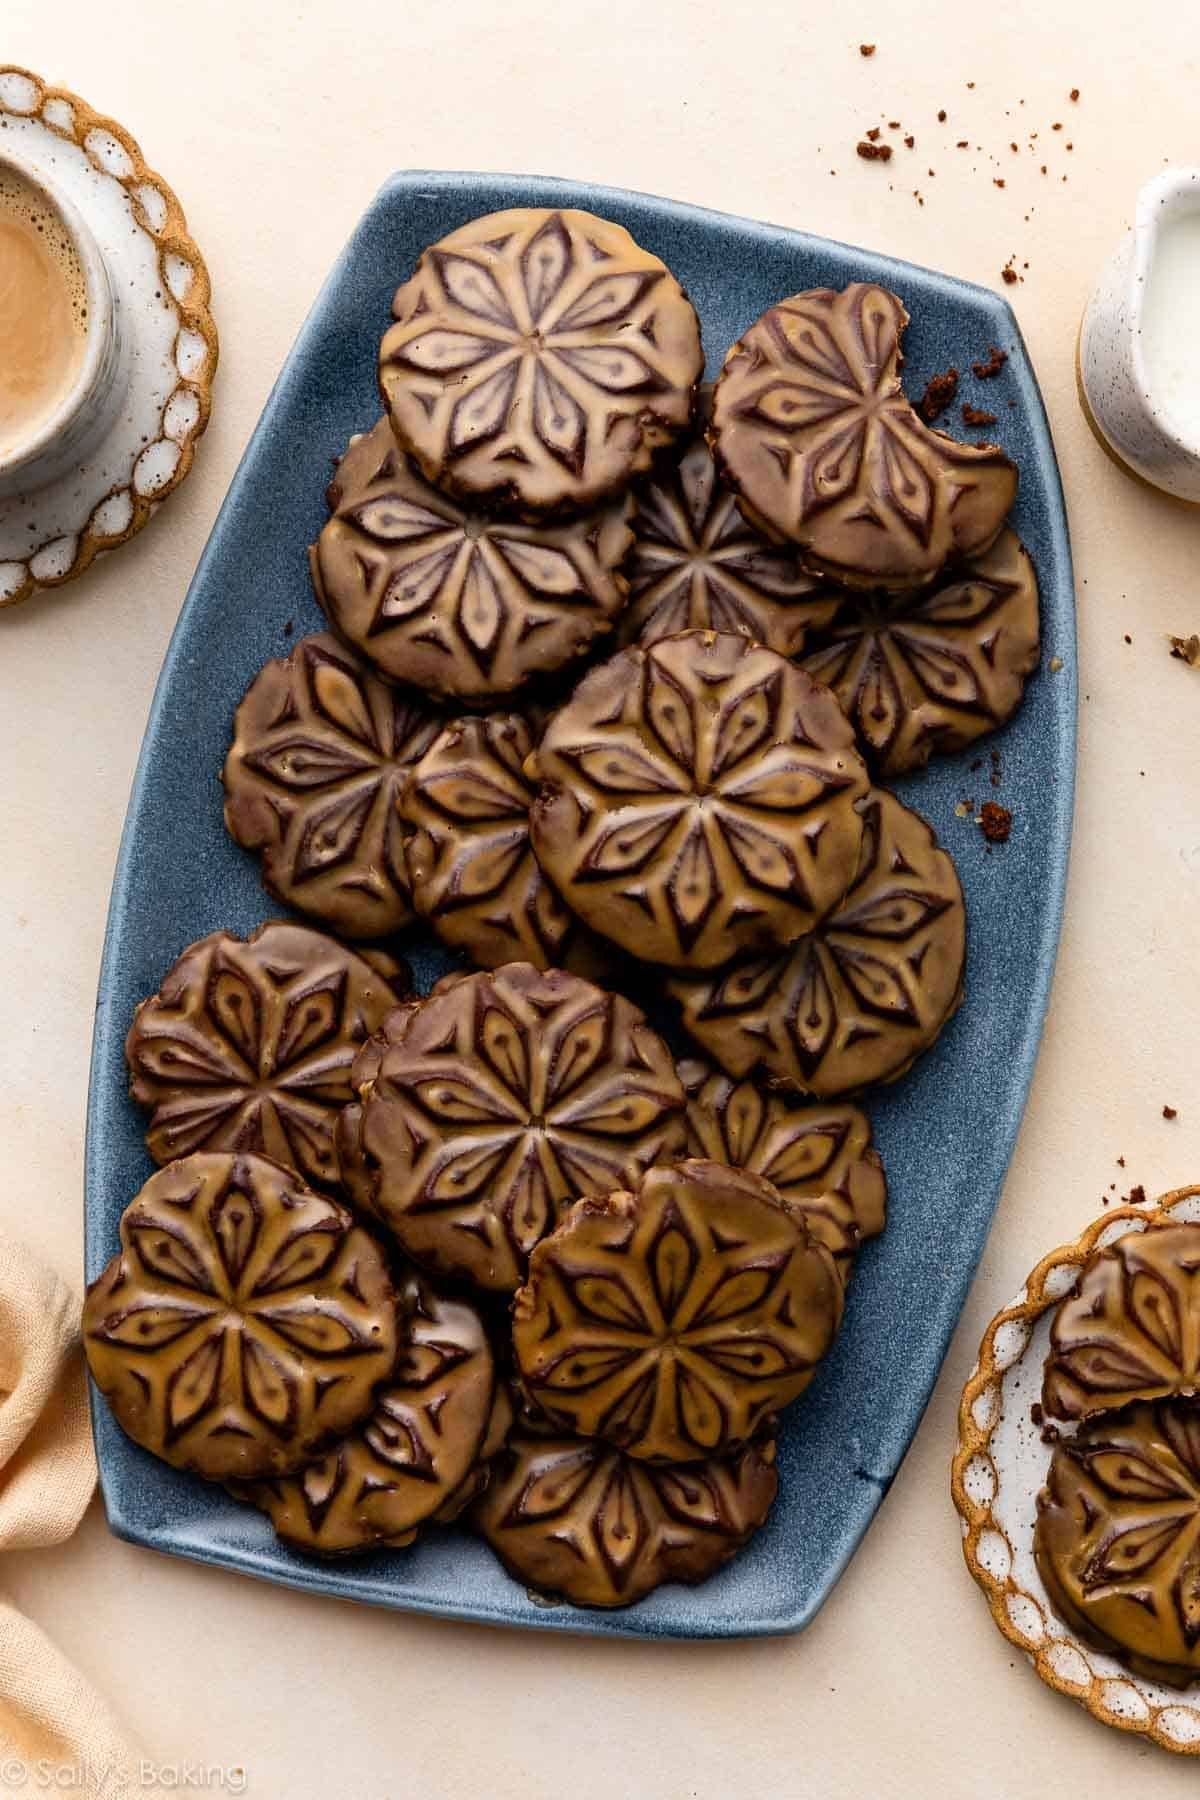
- Ideal for gifting. The glaze sets, allowing you to stack and store!
Pair them with… pretty much anything! Hot cocoa by the fireplace, an after-dinner cappuccino, or as a standout addition to your holiday cookie tins.
And once you have the cookie stamps, be sure to try these cinnamon brown sugar stamped cookies next!
Ingredients You Need
- Flour: All-purpose flour gives essential structure.
- Cocoa Powder: You can use either natural or Dutch-process cocoa powder.
- Espresso Powder: This is necessary for both the cookies and the glaze. Most grocery stores stock it in the baking aisle, or you can purchase it online. Espresso powder is commonly used in baking, so it’s useful for various recipes.
- Baking Powder: To help these cookies rise; they’d be dense without it.
- Salt: For flavor enhancement.
- Butter: Ensure it’s at room temperature for optimal creaming.
- Sugar: Granulated sugar sweetens these cookies.
- Egg: Just one egg binds all the ingredients together.
- Vanilla Extract: Even the richest cookies gain from a touch of vanilla!
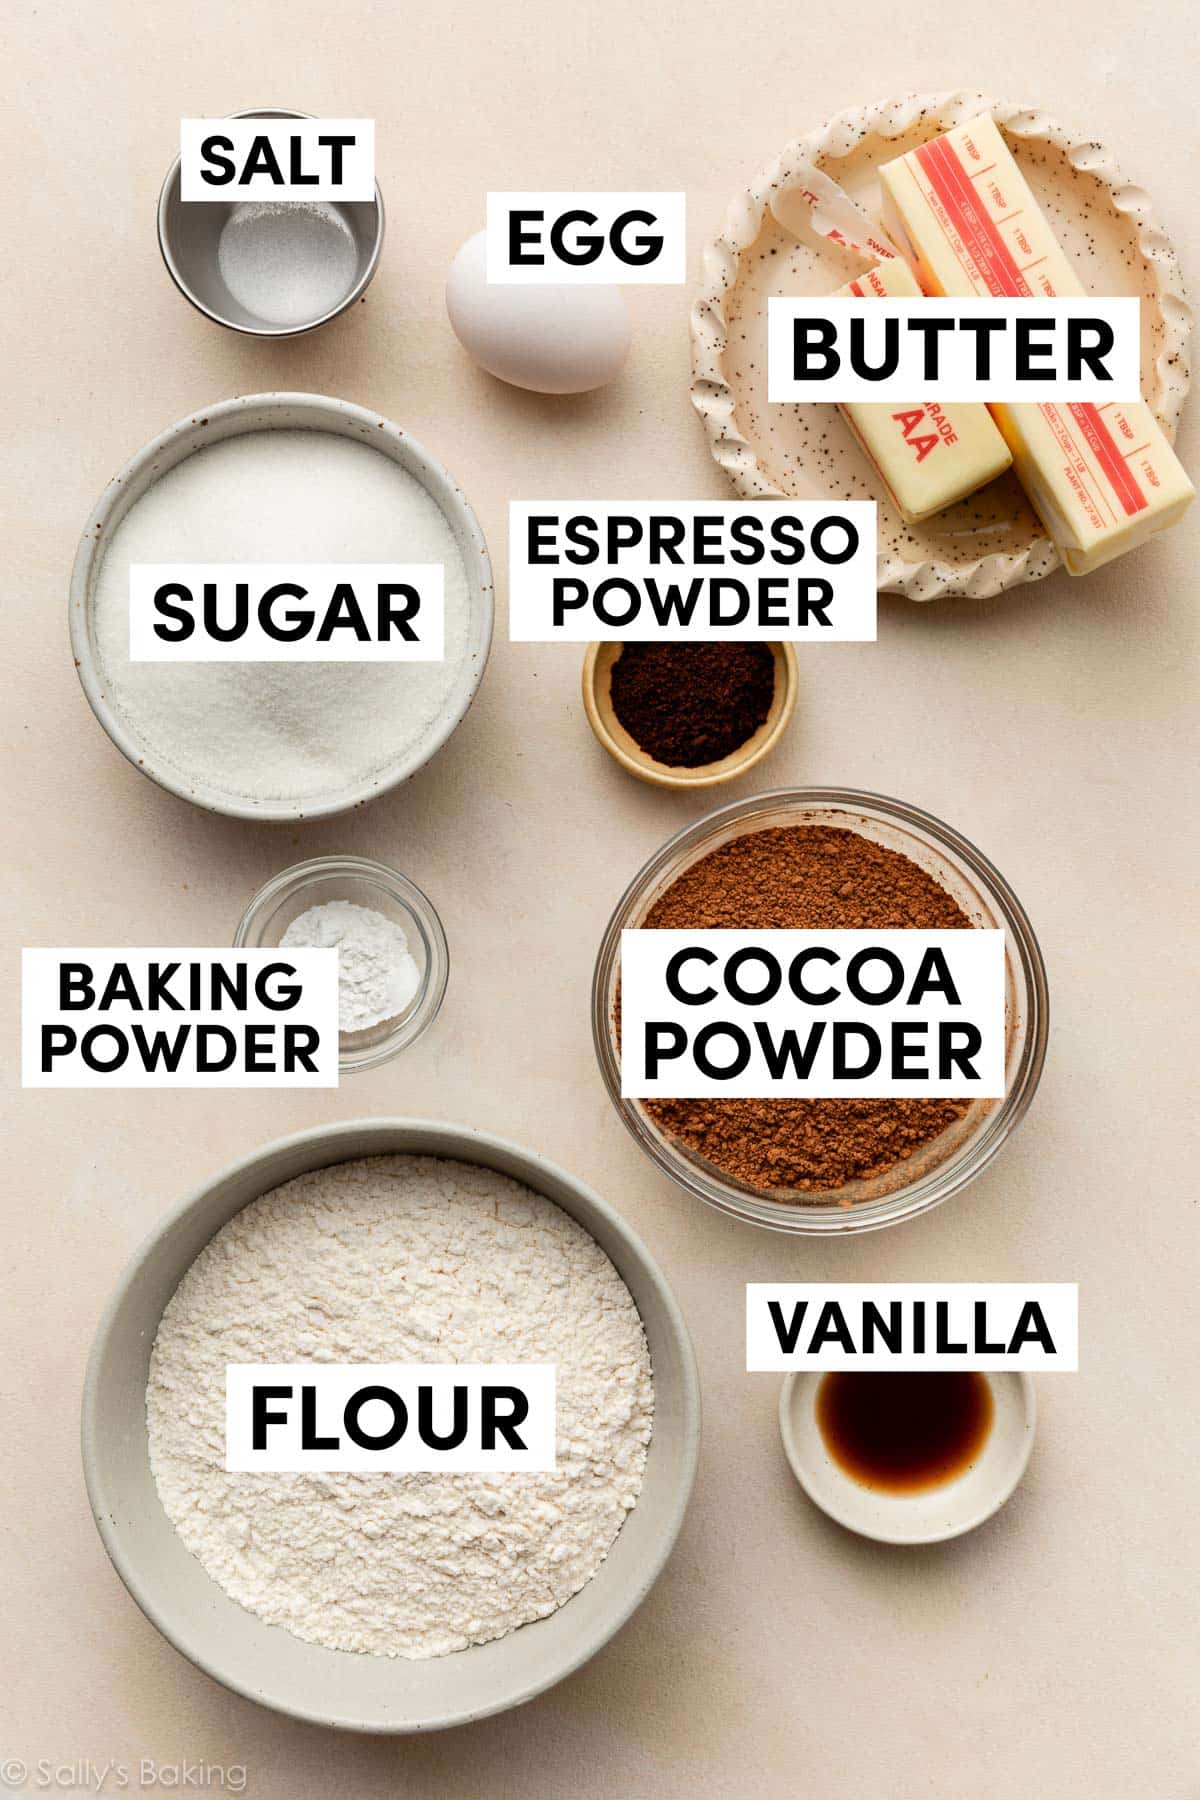
Additionally, you’ll need confectioners’ sugar and a bit of milk for the glaze.
Overview: How to Make Stamped Chocolate Cookies
The complete printable recipe is available below, but this summary should aid you in understanding the process before starting.
Prepare the cookie dough. This straightforward recipe comes together quickly with an electric mixer.
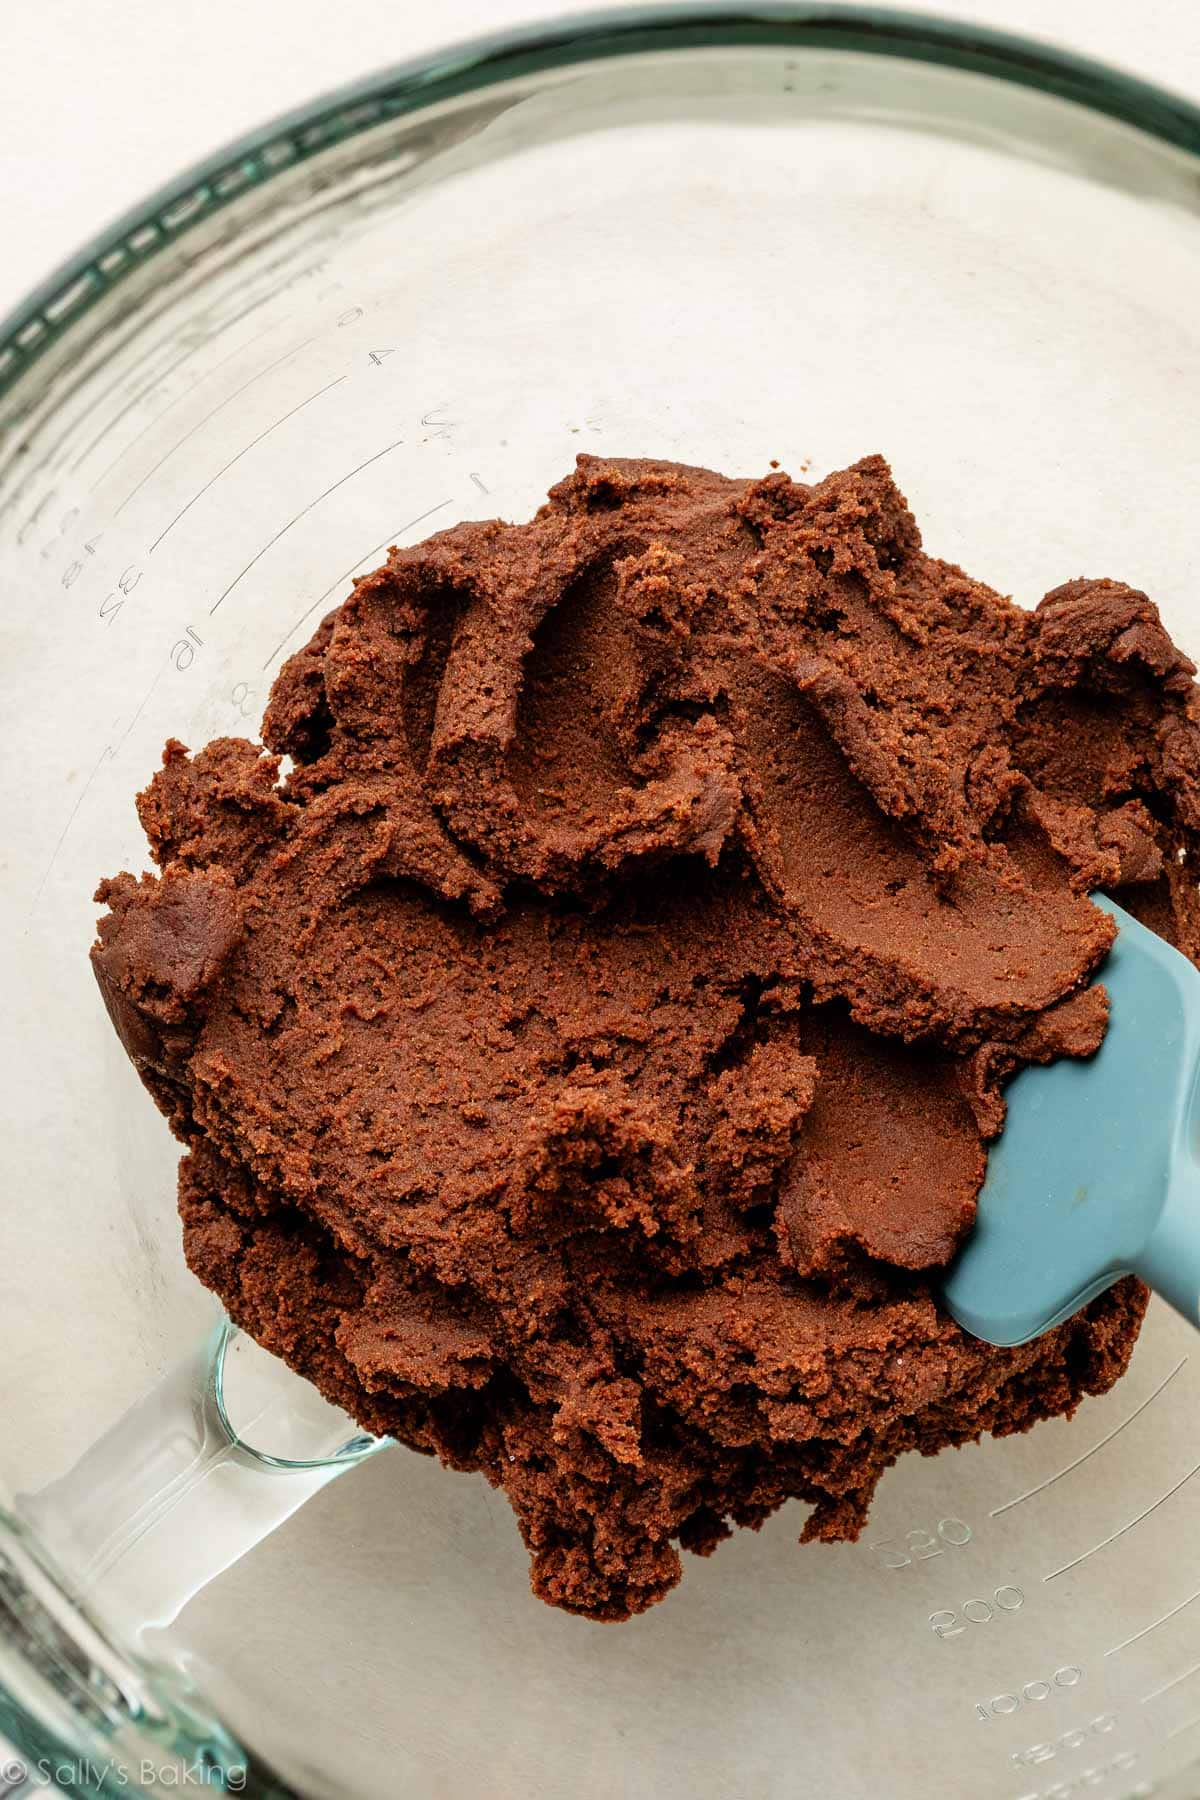
Chill the dough. Just an hour makes a significant difference in how easily you can shape the dough and stamp the cookies; it becomes excessively sticky otherwise.
Shape dough into balls. Scoop the chilled cookie dough, aiming for a heaping tablespoon (about 30g) per cookie, and roll into balls.
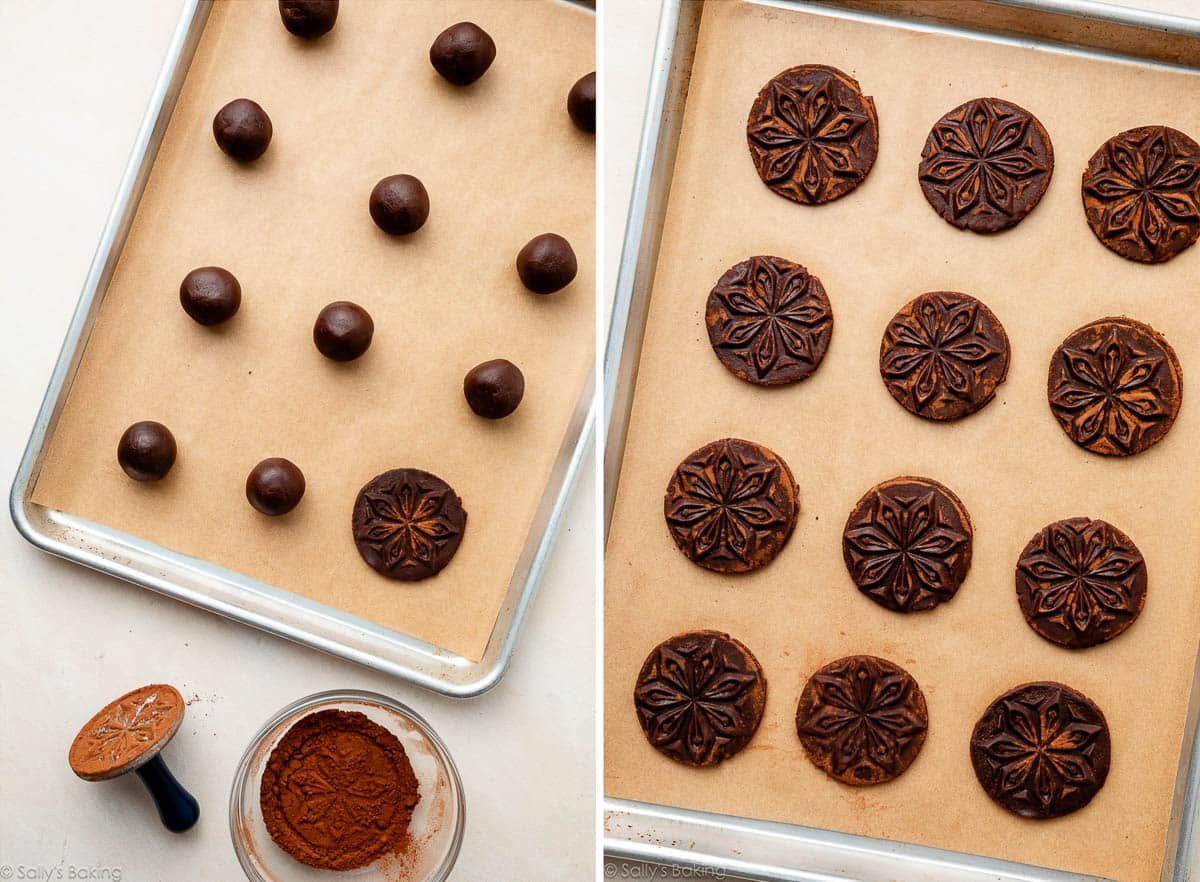
Stamp the dough balls. Get your cookie stamps. I used Nordic Ware’s “starry night” cookie stamps for the cookies shown. Center the stamp atop each cookie dough ball as accurately as possible, then press down firmly until the dough stretches nearly to the edges of the stamp. Lift straight up. If your dough sticks to the stamp (which can happen!), lightly dip the stamp in cocoa powder first before stamping the dough ball. A pastry brush can also help dust cocoa onto the stamp and brush off any excess from the cookie tops if desired.
Chill the stamped cookies for 1 hour prior to baking. This helps them maintain their shape while baking, ensuring your lovely stamped designs stay intact!
Bake. Remember one of my favorite cookie baking tips? Use your eyes as the timer, not the clock. Cookies are done when the edges are set.

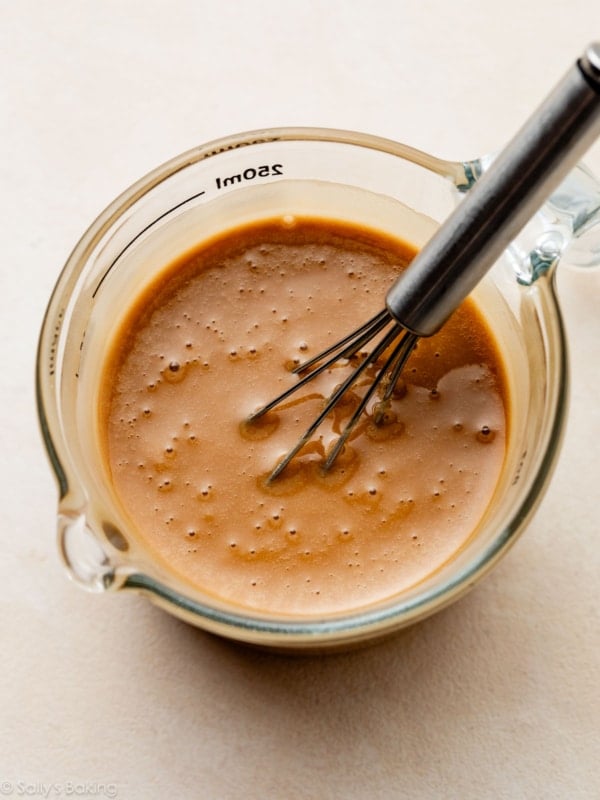
Espresso Glaze
This glaze is the same one used on my milk chocolate mocha blondies, just adjusted to accommodate all these cookies.
This smooth glaze sets nicely, allowing for easy stacking, storing, transporting, and gifting of these stunning cookies.
Success Tips for Stamped Chocolate Cookies
I’ve included most of these tips above, but let me summarize them. The clarity of your stamped design will depend on the recipe, how firm the cookie dough is, and the stamp used. Cookies naturally puffs up and spread in the oven, so the design may not retain full definition after baking.
- Recipe: Not all cookie doughs work well with stamps. Avoid using stamps on thick, fluffy cookies, as they typically puff up and lose the stamped design. Follow the recipe below for optimal results—we yield relatively flat cookies.
- Center the Stamp: Position the stamp centered on the cookie dough ball before pressing down.
- Dust Your Cookie Stamp: The dough can stick to the stamp. Lightly dust cocoa powder on your cookie stamp prior to stamping. You can brush off the excess from the stamped cookies afterward.
- Firm Dough: Ensure to chill the dough. Chill for one hour before shaping into cookies and another hour before baking. This is the best way to ensure they maintain their design!
- Stamp: Test out your cookie stamp to see how well it works. I’m a fan of Nordic Ware cookie stamps—they’re well made, durable, and efficient. I used the Starry Night ones in these images.
If you appreciate the sophisticated blend of coffee and chocolate, alongside a cookie that looks as fantastic as it tastes, then this recipe deserves a spot in your repertoire.
This chocolate espresso cookie dough is adapted from my chocolate sugar cookie recipe, which is designed for rolling and cutting. So yes! You can add the espresso powder, adhere to the shaping guidance from the chocolate sugar cookies recipe, and still dip the baked cookies in the espresso glaze.
This typically indicates the dough wasn’t chilled long enough, the stamp wasn’t pressed down firmly enough, or the dough had too much leavening. Stick to the specified chilling times in the recipe, and press the stamp firmly until the dough nearly reaches the edges.
Espresso powder delivers the strongest, most authentic coffee flavor in the cookies and dissolves smoothly in the glaze. In a pinch, you could use finely ground instant coffee, though the flavor would be milder and the texture less smooth.
This recipe is part of my annual cookie countdown called Sally’s Cookie Palooza. It’s the most extensive, most delicious event of the year! Explore a variety of cookie recipes on the Sally’s Cookie Palooza page.
Print
Description
Indulge in rich, decadent cookies that are beautifully stamped and topped with a glossy espresso glaze. These soft, slightly fudgy cookies get their bold flavor from cocoa and espresso powder, and the intricate look comes straight from the stamp—no fancy decorating skills needed. Ideal for gifting, holiday baking, or whenever you want an eye-catching cookie with minimal effort.
- Prepare the cookies: In a medium bowl, whisk together the flour, cocoa powder, espresso powder, baking powder, and salt. Set aside.
- In a large bowl using a handheld or a stand mixer fitted with a paddle attachment, beat the butter and sugar together on medium-high speed until smooth and creamy, about 3 minutes. (Here’s a helpful tutorial if you need guidance on how to cream butter and sugar.) Add the egg and vanilla, beating until combined, about 1 minute. Scrape down the sides and bottom of the bowl, mixing again as needed.
- Combine the dry ingredients with the wet ingredients, mixing on low speed until incorporated. The dough will be soft and sticky. Cover the bowl tightly and refrigerate for at least 1 hour, up to 2 days.
- Shape and stamp: Line large baking sheets with parchment paper or silicone baking mats. Scoop a heaping tablespoon (about 30g) of chilled cookie dough for each cookie and roll into balls. Place dough balls 3 inches apart on the prepared sheets. Center the cookie stamp over each dough ball, pressing down firmly until the dough nearly reaches the edges. Lift straight up. If the dough is sticking, lightly dust some cocoa powder on the stamp before stamping. Brush off any excess cocoa powder from the tops of the cookies if desired.
- Chill the stamped cookies in the refrigerator for 1 hour before baking.
- Preheat the oven to 350°F (177°C).
- Bake the cookies until the edges are set, about 11–13 minutes. Allow to cool on the tray for 5 minutes before transferring to a cooling rack to cool completely.
- Prepare the glaze: In a medium bowl, mix the espresso powder and warm water until dissolved. Whisk in the confectioners’ sugar and milk/cream, adjusting for thickness as necessary. Brush the glaze on top of the cookies with a pastry brush (or dip the tops as desired). The glaze will set in about 1 hour.
- Store leftover cookies tightly covered at room temperature for up to 1 week.
Notes
- Make Ahead & Freezing Instructions: You can prepare the cookie dough and refrigerate it for up to 2 days (step 3). Baked cookies, with or without icing, freeze well for up to 3 months. Thaw at room temp. Fresh glazes are best, so freeze without them and apply afterward. Unbaked cookie dough balls can also be frozen for up to 3 months. Thaw completely, then stamp and bake as directed.
- Special Tools (affiliate links): Glass Mixing Bowl | Whisk | Electric Mixer (Handheld or Stand) | Baking Sheets | Silicone Baking Mats or Parchment Paper | Cookie Stamps, like Starry Nights (shown) | Pastry Brush | Cooling Rack
- Espresso Powder: Most grocery stores carry espresso powder in the baking section, or you can find it online. It’s ideal for baking and works perfectly in various recipes. Provides the strongest coffee flavor and dissolves smoothly in glaze. Finely ground instant coffee can be used in a pinch, but flavor and texture may vary.
- Can I Skip the Espresso Powder? Yes. Simply omit it from the dough and the glaze, skipping the water. Instead, add 1/2 teaspoon vanilla extract to the confectioners’ sugar and milk mixture.
- Can I Make These Without Cookie Stamps? Absolutely! This chocolate espresso cookie dough adapts from my chocolate sugar cookies recipe, which is designed for rolling out. Create the espresso cookie dough and follow the shaping instructions from the chocolate sugar cookies recipe, allowing you to dip the baked cookies in the espresso glaze.